Introduction to Creating Your Gamepass in Roblox
Welcome to the world of Roblox, where creativity knows no bounds. If you're looking to enhance your gaming experience or create a unique feature for your game, learning how to create a Gamepass is an excellent place to start. In this tutorial, I show you the steps to create your very own Gamepass, which can be used to offer exclusive content or abilities to players who purchase it.
Understanding Gamepasses in Roblox
Before diving into the creation process, it's essential to understand what a Gamepass is. A Gamepass in Roblox is a type of item that can be purchased by players using their Robux, the virtual currency in the game. Gamepasses can grant players access to special perks, abilities, or items that are not available to those who don't have the pass. You can easily create a Gamepass to offer unique experiences to your players, making your game more engaging and appealing.
Creating Your Gamepass
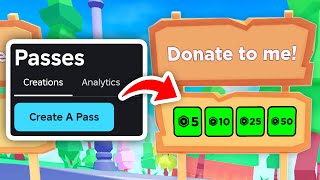
Hello! In this video, I quickly show you how to create a Gamepass in Roblox. To get started, you'll need to log in to your Roblox account and navigate to the "Create" section. From there, click on "Gamepasses" and then "Create Gamepass." This will take you to a page where you can configure your Gamepass settings.
When creating your Gamepass, you'll need to provide some basic information, such as the name and description of the pass. You can also upload an icon that will represent your Gamepass in the game. Make sure to choose an icon that is eye-catching and relevant to the content or feature that the Gamepass offers.
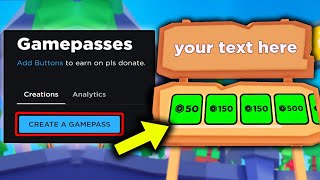
Configuring Gamepass Settings
In this tutorial, I show you how to configure the settings for your Gamepass. You'll need to set the price of the pass in Robux, which will determine how much players have to pay to purchase it. You can also choose whether the Gamepass is a one-time purchase or a recurring subscription. Additionally, you can set the Gamepass to be available for purchase by all players or limit it to certain groups or ranks.
Once you've configured the settings for your Gamepass, you can save it and make it available for purchase in your game. You can easily manage your Gamepasses and track their sales and revenue using the Roblox dashboard.
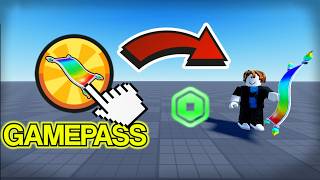
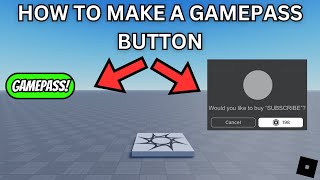
Using Gamepasses in Your Game
Hello! Today I will show you how to use Gamepasses in your Roblox game. To use a Gamepass, you'll need to create a script that checks if the player has purchased the pass. If they have, the script can grant them access to the exclusive content or feature that the Gamepass offers.
You can use Gamepasses to offer a wide range of exclusive content, from special items and abilities to access to restricted areas or game modes. The possibilities are endless, and it's up to you to decide how you want to use Gamepasses to enhance your game.
Tips and Best Practices
In this video, I show you some tips and best practices for creating and using Gamepasses in Roblox. One of the most important things to keep in mind is to make sure that your Gamepass offers value to players. If the pass is too expensive or doesn't offer enough exclusive content, players may not be willing to purchase it.
Another tip is to make sure that your Gamepass is well-promoted in your game. You can use signs, banners, and other advertisements to let players know about the pass and what it offers. You can also offer discounts or promotions to encourage players to purchase the pass.
Conclusion
Learn how to create your Gamepass in Roblox and take your gaming experience to the next level. With Gamepasses, you can offer exclusive content and features to players who are willing to pay for them. By following the steps outlined in this tutorial, you can easily create your own Gamepass and start selling it to players in your game.
Remember to always follow the Roblox terms of service and guidelines when creating and using Gamepasses. With a little