Introduction to Creating a Kill Part in Roblox Studio 2023
In this article, we will guide you through the process of creating a kill part in Roblox Studio 2023. This is a simple tutorial designed for beginners, and it should take less than 3 minutes to complete. By the end of this tutorial, you will have a basic understanding of how to create a kill part and how to use it in your Roblox games.
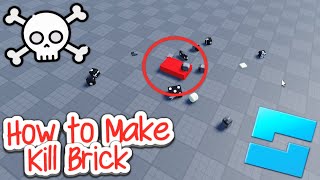
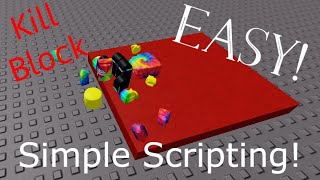
What is a Kill Part?
A kill part is an object in Roblox that can cause damage or kill a player's character when they come into contact with it. Kill parts are often used in obstacle courses, adventure games, and other types of games where players need to avoid certain objects to survive. They can be used to create challenging and engaging gameplay experiences for players.
Creating a Kill Part in Roblox Studio 2023
To create a kill part in Roblox Studio 2023, follow these steps:
- Open Roblox Studio 2023 and create a new project or open an existing one.
- In the Explorer window, right-click and select "Part" to create a new part.
- Name the part "KillPart" or any other name that you prefer.
- Set the part's properties, such as its size, shape, and color, to your liking.
- To make the part a kill part, you will need to add a script to it. Right-click on the part and select "Insert Object" > "LocalScript" or "Script".
Adding a Script to the Kill Part
The script will contain the code that will cause the player's character to die when they come into contact with the kill part. Here is an example of a basic script that you can use:
Remember to replace "KillPart" with the actual name of your part.
To add the script, follow these steps:
- Double-click on the script to open it in the Script Editor.
- Copy and paste the following code into the Script Editor:
Note: The code will be in Lua, which is the scripting language used in Roblox.
Using the Kill Part in Your Game
Once you have created the kill part and added the script to it, you can use it in your game. To do this, simply place the kill part in the desired location in your game world. When a player's character comes into contact with the kill part, the script will be triggered, and the character will die.
You can customize the kill part and the script to fit your specific needs. For example, you can change the size and shape of the part, or you can modify the script to cause different effects when the player's character comes into contact with it.
Tips and Variations
Here are some tips and variations to help you get the most out of your kill part:
- Use different shapes and sizes to create a variety of kill parts.
- Experiment with different colors and textures to make the kill part stand out.
- Add multiple kill parts to create a challenging obstacle course.
- Use scripts to create different effects, such as explosions or sound effects, when the player's character comes into contact with the kill part.
Conclusion
Creating a kill part in Roblox Studio 2023 is a simple process that can add a new level of challenge and excitement to your games. By following the steps outlined in this tutorial, you can create a basic kill part and use it in your games. Remember to experiment with different shapes, sizes, and scripts to create a unique and engaging gameplay experience for your players.