How To Make Brown Paper: A Simple DIY Guide
Whether you’re looking to add a rustic touch to your scrapbook, create custom gift wrap, or simply enjoy a hands‑on craft, making brown paper at home is a rewarding project. In this guide, I’ll walk you through the process step by step, using everyday materials you probably already have in the kitchen. Let’s get started!
What You’ll Need
- Plain white paper – printer paper, newspaper, or any lightweight sheet works.
- Tea bags or instant coffee – the natural pigments will give your paper that warm, earthy tone.
- Large pot – for boiling the tea or coffee.
- Water – enough to fully submerge the paper.
- Rubber gloves – optional, but helpful for handling hot, stained paper.
- Drying rack or clean towels – to lay the paper flat while it dries.
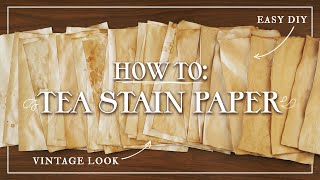
Step‑by‑Step DIY: Tea‑Staining Your Paper
Join me for this super easy DIY as I tea stain a batch of paper to achieve that perfect brown hue. The method is straightforward, and you’ll have a stack of beautiful, reusable brown paper in just a few hours.
- Prepare the staining solution. Bring 2 cups of water to a boil, then add 4–5 tea bags (or 2 tablespoons of instant coffee). Let the mixture steep for 5–7 minutes until it reaches a deep amber color. The longer it steeps, the darker your paper will become.
- Cool the liquid. Allow the tea to cool to a warm temperature (about 120°F/49°C). This prevents the paper from tearing when it’s submerged.
- Submerge the paper. Place a sheet of white paper into the liquid, making sure it’s fully immersed. Gently wiggle it for a few seconds to ensure even absorption.
- Let it soak. For a light brown, soak for 30 seconds. For a richer tone, leave the paper in the solution for up to 2 minutes. Keep an eye on the color change – you can always add more tea if needed.
- Remove and dry. Using tongs or a clean spoon, lift the paper out of the liquid. Place it on a drying rack or a flat towel. Allow it to air dry completely, which may take 1–2 hours depending on humidity.
- Repeat if necessary. If the shade isn’t dark enough, repeat steps 3–5 with a fresh batch of tea. Multiple layers create depth and a more authentic brown texture.
Tips for Perfect Brown Paper
Here are a few insider tricks to help