How To Make Pancake Art Without Squeeze Bottle: A Step‑by‑Step Guide
Creating cute pancake designs used to require a squeeze bottle, but you can achieve the same fun results with everyday kitchen tools. Whether you’re a parent looking for a kid‑friendly activity or a small business wanting to add a playful touch to your menu, this guide shows you how to master pancake art without the extra equipment.
What You’ll Need
- Non‑stick skillet or griddle – pre‑heated to medium heat.
- Batter – a simple pancake mix or homemade batter (see recipe below).
- Alternative piping tools:
- Small spoon or dessert spoon.
- Zip‑lock bag (cut a tiny corner).
- Plastic squeeze bottle (e.g., a clean ketchup bottle).
- Ice‑cream scoop for larger shapes.
- Paper towels, spatula, and a plate for serving.
Simple Pancake Batter Recipe
- In a bowl, whisk together 1 cup flour, 2 teaspoons baking powder, and a pinch of salt.
- Add 1 cup milk, 1 egg, and 2 tablespoons melted butter. Mix until smooth; a few small lumps are fine.
- Let the batter rest for 5 minutes. This allows bubbles to form, giving the art a light texture.
Technique #1: The Spoon Method
The spoon method is perfect for beginners and works well for bold outlines and simple shapes.
- Dip a small spoon into the batter, then tap gently against the side of the bowl to remove excess.
- Hold the spoon about 1‑2 inches above the skillet and drizzle the batter in a steady stream. Move your hand in a “pen‑like” motion to draw lines.
- For filled shapes, first draw the outline, then fill the interior by moving the spoon in a back‑and‑forth motion.
- Allow the batter to set for 30‑45 seconds before flipping. The edges should be firm and the surface lightly golden.
Technique #2: Zip‑Lock Bag Piping
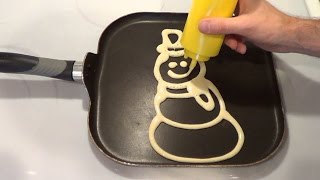
This approach mimics a squeeze bottle but uses a plastic bag you already have.
- Fill a zip‑lock bag with batter, squeezing out as much air as possible.
- Snip a ¼‑inch corner off the bag. The smaller the cut, the finer the line you can draw.
- Press the bag gently to release batter, guiding the tip with your fingers to create curves, dots, or letters.
- Practice on a plate first; once you’re comfortable, move to the hot skillet.