How To Screenshot HDR on Windows: A Step‑by‑Step Guide
High‑Dynamic‑Range (HDR) content looks stunning on modern monitors, but capturing it correctly can be tricky. A regular screenshot often flattens the colors, resulting in a dull image that doesn’t represent what you see on screen. This article explains how to screenshot HDR on Windows using built‑in tools, free utilities, and a few pro‑level tricks. Follow the steps below to preserve the full brightness, contrast, and color depth of your HDR content.
Why HDR Screenshots Need Special Handling
HDR expands the luminance range far beyond the standard 8‑bit sRGB space. When Windows saves a screenshot as a typical PNG or JPEG, it usually converts the image to the SDR (Standard Dynamic Range) color space, discarding the extra detail. The result is a screenshot that looks washed‑out or blurry, especially on text‑heavy pages. To keep the original fidelity you must:
- Capture the screen in a format that supports 10‑bit or higher color depth.
- Avoid any automatic scaling or compression that reduces resolution.
- Use a tool that can read the HDR frame buffer directly.
Prerequisites
- Windows 10 version 1809 or later (HDR support built into the OS).
- An HDR‑compatible monitor and a graphics card that can output HDR.
- Graphics drivers up to date – HDR features are refined with each driver release.
- Optional: a 4K or higher resolution display for the best detail.
Method 1: Using the Windows Game Bar (Built‑In)
Step‑by‑Step
- Press Win + G to open the Game Bar overlay.
- Click the Capture widget (or press Win + Alt + PrtScn).
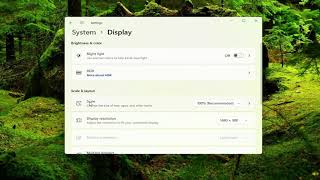
- Make sure the Capture HDR content toggle is turned on in Settings → Gaming → Captures.
- Press the capture button. The screenshot is saved to Videos\Captures as a PNG file.
The Game Bar stores the image in a 10‑bit PNG when HDR is active, preserving most of the original range. This method works well for games, video players, and any window that uses the Windows HDR pipeline.
Method 2: Using Microsoft PowerToys (Free Utility)
Installation
Download PowerToys from the official GitHub page


![[GUIDE] How to Screenshot, Record, Stream in HDR + Share and stream HDR on Discord.](https://i.ytimg.com/vi/VTocHQP8kxU/mqdefault.jpg)