How to Screenshot in Windows Media Player
While enjoying videos on Windows Media Player, you might want to capture a specific moment or frame from your favorite movie or video. Fortunately, Windows Media Player provides a simple method to take a screenshot of a video. In this article, we will learn how to make a screenshot in Windows Media Player.
Understanding the Basics
Before we dive into the process of taking a screenshot, it's essential to understand the basics of Windows Media Player. Windows Media Player is a media player and library application developed by Microsoft. It allows users to play audio and video files, as well as view images. The application also provides various features, such as creating playlists, ripping CDs, and burning CDs and DVDs.
How to Make a Screenshot in Windows Media Player
To take a screenshot in Windows Media Player, follow these steps:
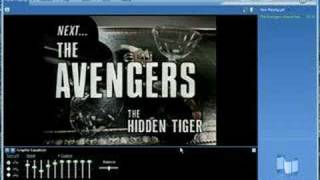
- Open Windows Media Player and play the video from which you want to capture a screenshot.
- Pause the video at the desired frame by clicking the "Pause" button or pressing the spacebar.
- Press the Print Screen button on your keyboard. This button is usually located on the top row of keys and may be labeled as "PrtScn" or "Print Screen."
- Open an image editing application, such as Microsoft Paint.
- Press Ctrl + V to paste the screenshot into the image editing application.
- Crop the screenshot to remove any unwanted parts, such as the Windows Media Player interface.
- Save the screenshot as an image file, such as a JPEG or PNG.
Alternative Method
If you prefer not to use the Print Screen button, you can use the Snipping Tool application that comes with Windows. To use the Snipping Tool, follow these steps:
- Open the Snipping Tool application. You can search for it in the Start menu or type "Snipping Tool" in the Run dialog box (Windows key + R).
- Click on the "New" button to start a new snip.
- Select the "Window" option to capture the Windows Media Player window.
- Click on the Windows Media Player window to capture it.
- Save the screenshot as an image file.
Tips and Variations
Here are some tips and variations to help you take better screenshots in Windows Media Player:
- Use the Windows key + Print Screen shortcut to capture a screenshot and save it directly to the "Screenshots" folder in your "Pictures" library.
- Use the Game Bar application to capture screenshots and record videos of your gameplay. To access the Game Bar, press the Windows key + G during gameplay.
- Use third-party screenshot tools, such as Snagit or Lightshot, to capture screenshots and edit them with advanced features.
Conclusion
In conclusion, taking a screenshot in Windows Media Player is a simple process that can be done using the Print Screen button or the Snipping Tool application. By following the steps outlined in this article, you can capture a screenshot of your favorite video and save it as an image file. Whether you're a casual user or a power user, learning how to make a screenshot in Windows Media Player can be a useful skill to have.