Introduction to Screenshots in Windows
Whether you need to capture a specific moment on your screen or preserve important information, taking a screenshot is a useful skill to have. While many people are familiar with using the Print Screen button to capture their screen, there are other ways to take a screenshot in Windows without using this button. In this tutorial, we show you how to take a screenshot in Windows without relying on the Print Screen function.
Method 1: Using the Snipping Tool
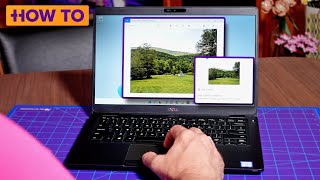
The Snipping Tool is a built-in Windows application that allows you to capture a screenshot of a specific area of your screen. To access the Snipping Tool, you can search for it in the Start menu or type "snippingtool" in the Run dialog box. Once you open the Snipping Tool, you can choose from four different modes: Full-screen, Window, Rectangle, and Free-form. Select the mode that best suits your needs, and then click and drag the crosshair to capture the desired area of your screen.
Step-by-Step Instructions for Using the Snipping Tool
To use the Snipping Tool, follow these steps:
- Open the Snipping Tool by searching for it in the Start menu or typing "snippingtool" in the Run dialog box.
- Choose the mode you want to use: Full-screen, Window, Rectangle, or Free-form.
- Click and drag the crosshair to capture the desired area of your screen.
- Release the mouse button to capture the screenshot.
- Save the screenshot to your desired location.
Method 2: Using the Windows Keyboard Shortcut
This video shares with you 4 ways to take a screenshot in Windows, including using the Windows keyboard shortcut. To take a screenshot using the Windows keyboard shortcut, press the Windows key + Print Screen (or Windows key + Volume Down on a tablet). This will capture the entire screen and save it to the "Screenshots" folder in your "Pictures" library. You can then access the screenshot by navigating to the "Screenshots" folder.
Benefits of Using the Windows Keyboard Shortcut
Using the Windows keyboard shortcut is a quick and easy way to take a screenshot. The benefits of using this method include:
- Speed: The Windows keyboard shortcut allows you to take a screenshot quickly and easily.
- Convenience: The screenshot is automatically saved to the "Screenshots" folder, making it easy to access later.
Method 3: Using the Game Bar
In this short video we show you how to take a screenshot using the Game Bar. The Game Bar is a feature in Windows that allows you to capture screenshots and record video of your gameplay. To access the Game Bar, press the Windows key + G. From the Game Bar, you can click the "Screenshot" button to capture the entire screen. You can also use the Game Bar to record video of your screen by clicking the "Record" button.
Step-by-Step Instructions for Using the Game Bar
To use the Game Bar, follow these steps:
- Press the Windows key + G to access the Game Bar.
- Click the "Screenshot" button to capture the entire screen.
- Save the screenshot to your desired location.
Method 4: Using Third-Party Applications
Struggling with the built-in screenshot tools in Windows? There are many third-party applications available that can help you take a screenshot. Some popular options include Snagit, Lightshot, and Greenshot. These applications offer a range of features, including the ability to capture specific regions of the screen, add annotations, and share screenshots with others.
Benefits of Using Third-Party Applications
Using third-party applications can offer several benefits, including:
- More features: Third-party applications often offer more features than the built-in screenshot tools in Windows.
- Customization: Third-party applications can be customized
![How to Print Screen Without Printscreen Button [Guide]](https://i.ytimg.com/vi/IRJ8iroFr40/mqdefault.jpg)