Curated coverage and comprehensive guides by Fresh Picks.
How To Take Screenshot In Windows From Keyboard: A Power User's Guide
The Importance of Hotkeys in Productivity
We could spend all day arguing the merits of a good productivity tool, but one thing is certain: hotkeys are a game-changer. They improve your everyday work, give you a competitive edge, and save you time. If you wanna be a power user, you shouldn't deny the usefulness of hotkeys. They are an essential part of any Windows user's toolkit.
The Basics of Taking a Screenshot in Windows
Taking a screenshot is a fundamental task in Windows, and there are several ways to do it. You can use the Print Screen button, the Snipping Tool, or even third-party software. However, in this article, we will focus on taking a screenshot using the keyboard.
The Prerequisites
Before we dive into the nitty-gritty of taking a screenshot using the keyboard, you need to understand the basic keyboard shortcuts in Windows. Here are a few essential ones:
- Windows Key + E: Opens the File Explorer.
- Windows Key + D: Shows the desktop.
- Windows Key + Tab: Cycles through open windows.
Taking a Screenshot Using the PrtScn Button and Paint
The most commonly used method of taking a screenshot is by using the Print Screen button (PrtScn). Here's how to do it:
1. Press the PrtScn button on your keyboard.
2. Open the Paint application by searching for it in the Start menu.
3. Press Ctrl + V to paste the screenshot into Paint.
4. Save the screenshot as a file.
However, this method doesn't allow you to capture a specific region of the screen. For that, you need to use the Snipping Tool.
Taking a Screenshot Using the Snipping Tool
The Snipping Tool is a built-in Windows application that allows you to capture a specific region of the screen. Here's how to use it:
1. Press the Windows Key + S to open the Snip & Sketch application.
2. Choose the type of snip you want to take:
* Full Screen: Captures the entire screen.
* Window: Captures a specific window.
* Rectangular Snip: Captures a specific region of the screen.
* Free-form Snip: Captures a specific region of the screen in a free-form shape.
3. Click and drag the cursor to select the area you want to capture.
4. The screenshot will be automatically saved to the clipboard.
Taking a Screenshot Using a Keyboard Shortcut
Now, let's talk about taking a screenshot using a keyboard shortcut. Unfortunately, there isn't a built-in keyboard shortcut in Windows that allows you to take a screenshot. However, you can use the Windows Key + PrtScn shortcut to capture a screenshot, but it will be saved to the Pictures\Screenshots folder instead of the clipboard.
Third-Party Software for Taking Screenshots
If you're looking for a more advanced screenshot tool, you can use third-party software like Snagit or Greenshot. These tools offer more features and flexibility than the built-in Snipping Tool.
Conclusion
Taking a screenshot in Windows from the keyboard requires a combination of keyboard shortcuts and third-party software. While there isn't a built-in keyboard shortcut for taking a screenshot, you can use the Windows Key + PrtScn shortcut to capture a screenshot and save it to the Pictures\Screenshots folder. We hope this article has helped you learn how to take a screenshot in Windows from the keyboard and improve your productivity.
Related Coverage
32 Secret Combinations on Your Keyboard
Have
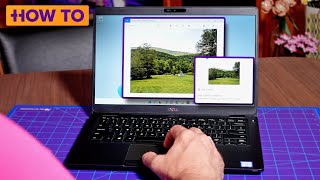
How to take a screenshot on a PC or laptop with Windows
We could spend all day arguing the merits of a good
15 Amazing Shortcuts You Aren't Using
If you wanna be a power user, you shouldn't deny the usefulness of hotkeys. They improve your everyday work and give an ...
Windows 11 screenshots: Here's 7 ways to capture your screen
Whether you need to
How To Take Screenshot On PC & Laptop Windows - Full Guide
Learn
How to take a screenshot on Windows with CTRL + Print Screen