Phone Craft: A Fun DIY Project for Kids and Families
Phone Craft has become a popular DIY activity that lets children turn ordinary paper into a pretend smartphone. The project is simple enough for preschoolers yet engaging for older kids who love to add a personal touch. By combining creative crafts with a bit of storytelling, Phone Craft encourages fine‑motor skills, imagination, and a love for hands‑on learning.
Why Choose Phone Craft for Kids?
Parents and educators often look for activities that are both entertaining and educational. Phone Craft checks those boxes for several reasons:
- Boosts creativity – Kids can design their own screen layout, choose colors, and add stickers or drawings.
- Develops fine‑motor skills – Cutting, folding, and gluing improve hand‑eye coordination.
- Encourages storytelling – Children invent calls, messages, and games for their paper phone.
- Supports screen‑time balance – It offers a tactile alternative to digital devices while still playing with the idea of a phone.
Getting Started: Materials You’ll Need
All the supplies for a basic Phone Craft are easy to find at home or in a classroom supply closet.
- Cardstock or thick paper (any color you like)
- Scissors (child‑safe tip scissors are ideal)
- Glue stick or white glue
- Markers, crayons, or colored pencils
- Stickers, sequins, or foam shapes for decoration
- Optional: clear contact paper to protect the “screen”
Step‑by‑Step Instructions
1. Cut the Phone Shape
Draw a rectangle about 4 × 6 inches on the cardstock. Round the corners slightly to mimic a modern smartphone. Cut out the shape with child‑safe scissors.
2. Create the Screen
Measure a smaller rectangle (about 3.5 × 5.5 inches) and cut it from a contrasting piece of paper. This will be the “screen.” Glue it onto the front of the phone, leaving a thin border to show the frame.
3. Add Buttons and Ports
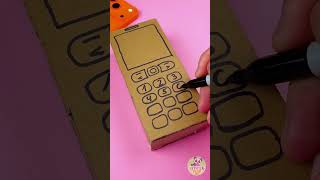
Use small circles of paper or stickers for the home button and volume controls. A tiny strip of black paper can serve as a headphone jack. Glue these elements in the appropriate places.
4. Design the Interface
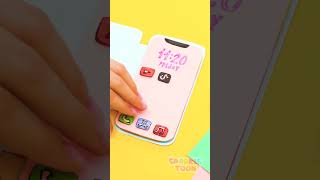
Encourage kids to draw app icons, a battery indicator, and a signal bar on the screen. Markers work best for bold lines, while crayons add a softer look. For a realistic finish, cover the screen with a piece of clear contact paper.
5. Personalize the Back
Allow children to decorate the back of the phone with their