Printable Baby Shower Cards: A Complete Guide to Design, DIY, and Selling
Baby showers are a wonderful way to celebrate the arrival of a new little one, and a beautifully crafted card can set the tone for the entire event. Printable baby shower cards combine the personal touch of a handmade invitation with the convenience of digital design. Below you’ll find everything you need to create, customize, and even sell printable baby shower cards— from selecting the right layout to marketing your designs on Etsy.
Why Choose Printable Baby Shower Cards?
- Instant customization: Change colors, fonts, and wording with a few clicks.
- Cost‑effective: Print only what you need, eliminating bulk‑ordering fees.
- Eco‑friendly: Reduce waste by printing on demand and using recycled cardstock.
- Versatile: Use the same file for invitations, thank‑you notes, or baby bump greetings.
Getting Started: Essential Supplies
Before you dive into design, gather these basic tools:
- Computer or tablet with design software (Canva, Adobe Illustrator, or free alternatives like GIMP).
- High‑resolution images or illustrations—many creators share free baby‑themed vectors.
- Quality cardstock (140‑200 gsm works well for a sturdy feel).
- Inkjet or laser printer capable of handling thick paper.
- Optional embellishments: stickers, stamps, or a light wash of watercolor for a handmade look.
Step‑by‑Step: Designing Your Card
Follow this simple workflow to produce a polished printable card.
- Choose a theme. Popular baby shower motifs include pastel animals, botanical prints, or gender‑neutral geometric patterns. Look for inspiration on Pinterest or at Beth’s Paper Cuts for free layout ideas.
- Set up your document. Use a standard size such as 5 × 7 inches or A6. Add a ¼‑inch bleed if you plan to trim the cards.
- Add text. Include the host’s name, date, time, venue, and RSVP details. Keep the font size readable—generally 12‑14 pt for body text and 24‑30 pt for headings.
- Incorporate a baby bump greeting. If you want a dual‑purpose card, add a small “Baby Bump Greeting” section on the inside. A short, heartfelt line such as “Celebrating the beautiful journey ahead” works well.
- Finalize colors. Use CMYK values for accurate printing. Soft blues, gentle pinks, and neutral greens are safe choices, but feel free to match the shower’s palette.
- Export as PDF. Choose “high quality print” and embed fonts to avoid substitution issues.
DIY Touches: Adding Hand‑Painted Elements
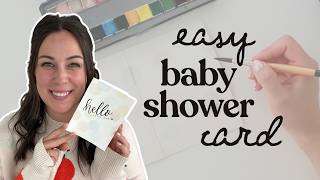
If you enjoy a crafty approach, watch a quick tutorial video (search “super simple DIY printable baby shower card”) that shows how to paint an adorable motif directly onto the printed card. Use water‑based acrylics for quick drying, and seal with a light spray fixative to protect the artwork.
Printing Tips for a Professional Finish
- Print a test page on regular paper first to check alignment and color.
- Use a printer setting labeled “photo paper” or “best quality” for richer colors.
- Allow the ink to dry completely before handling to prevent smudging.
- If you lack a high‑quality printer, many local print shops offer affordable short‑run printing on premium cardstock.
Customizing for Different Occasions
While the primary focus is baby showers, the same layout can be adapted for related events:
- Gender reveal parties: Swap the color scheme and add a “He or She?” graphic.
- Newborn photo announcements: Replace the event details with a photo placeholder.
- Thank‑you cards: Keep the front design and add a simple “Thank you” message inside.
Marketing Your Printable Cards on Etsy
Many designers turn their printable creations into a side business. If you’re ready to sell, follow these proven steps:
- Set up a shop. Choose a memorable name that reflects your niche, such as “SweetBumpPrintables.”
- Create eye‑catching listings. Use high‑resolution mockups—place the card on a wooden table with a cup of tea to convey a cozy vibe.
- Write clear descriptions. Include file format (PDF), dimensions, printable instructions, and any required software.
- Price competitively. For a single design, $5‑$8 is typical; offer bundles for a small discount.
- Promote on social media. Short videos showing the “how to make” process attract buyers who enjoy DIY projects.
Finding the Perfect Handmade Look
Even though the card is printable, you can achieve a handmade feel by:
- Using textured cardstock that mimics watercolor paper.
- Adding a thin border of hand‑drawn doodles in the corners.
- Including a small envelope with a matching pattern for a cohesive presentation.
Final Thoughts
Printable baby shower cards offer a blend of creativity, convenience, and cost savings. By selecting a theme, following a clear design workflow, and adding personal touches—whether a painted illustration or a sweet baby bump greeting—you can craft cards that feel both professional and heartfelt. And if you’re inclined to share your talent, the same designs can become a thriving digital product on platforms like Etsy. With the right tools and a little imagination, your printable cards will become a cherished part of every baby shower celebration.