What Is a Printable Star Map?
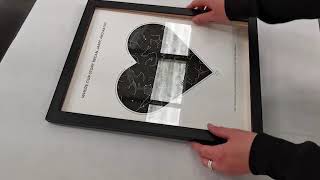
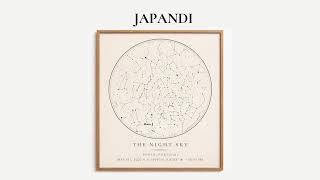
A Printable Star Map is a custom illustration of the night sky at a specific date, time, and location. It shows the exact positions of constellations, planets, and bright stars, allowing you to capture a moment in the cosmos and turn it into a piece of wall art, a keepsake, or a unique gift.
Why Choose a Printable Star Map?
People love printable star maps because they combine personal meaning with astronomical accuracy. Whether you want to commemorate a wedding, a birth, or the night you first met, a star map provides a visual reminder of that special moment. It also fits perfectly into modern home décor, adding a touch of celestial elegance without the need for expensive framing or glass.
Key Benefits
- Personalization: You decide the exact date, time, and place.
- Affordability: Printable files are usually cheaper than pre‑framed prints.
- Instant Access: Download the file and print at home or at a local print shop.
- Versatility: Use it as a poster, canvas, or even a phone case.
How to Create Your Own Printable Star Map
Creating a custom star map is easier than ever thanks to free online tools and simple graphic editors. Follow these steps to design a map that reflects your unique story.
Step 1 – Gather the Details
- Identify the exact date and time of the event you want to capture.
- Note the latitude and longitude of the location (city, park, or even a backyard).
- Decide on a style: minimalist line art, vintage parchment, or modern color gradients.
Step 2 – Generate the Sky Image
Several free astronomy programs let you view the night sky for any moment in history. While Stellarium’s right‑click download feature has been disabled, you can still capture the desired area by using a screen grab. Open Stellarium, set the date, time, and location, then press Print Screen (or use a snipping tool) to save the image.
Step 3 – Refine the Image in Inkscape
Inkscape, a free vector editor, lets you trace the sky image, adjust line thickness, and add text. Import the screenshot, use the Trace Bitmap function to convert the stars and constellations into scalable vectors, and then delete any background clutter. This process ensures the final map looks crisp at any print size.
Step 4 – Add Personal Details
Insert the following elements using Inkscape’s text tool:
- The exact date and time.
- The name of the location (city or venue).
- A short dedication or quote, such as “Under the same stars we first met.”
Step 5 – Export and Print
When you’re satisfied with the layout, export the file as a high‑resolution PDF or PNG. Most home printers handle up to 300 dpi, but for larger formats,