How to Create a Clean Tree Trunk Outline – A Step‑by‑Step Guide
Drawing a tree trunk outline is one of the most rewarding first steps for anyone who wants to sketch nature, design a logo, or add a rustic element to a craft project. The process is simple, but it works best when you follow a clear approach and practice a few basic techniques. Below you’ll find a complete tutorial that walks you through the entire workflow, from gathering reference material to adding leaves and finishing touches.
Why Start with an Outline?
A well‑defined outline gives your tree a solid foundation. It helps you:
- Establish the overall shape and proportion before adding details.
- Maintain consistency when you draw multiple trees in a scene.
- Provide a clean edge that works well for digital tracing, screen printing, or cut‑out crafts.
Because the outline is the backbone of the drawing, learning how to draw a simple trunk first makes the rest of the process much easier.
Materials You’ll Need
- Pencil – a light HB for the initial sketch.
- Paper – any smooth drawing paper or a sketchbook page.
- Eraser – a kneaded eraser works well for soft corrections.
- Fine‑line pen or marker – for finalizing the outline.
- Reference images – photos of real tree trunks or simple line art you find online.
Step‑by‑Step: Drawing the Tree Trunk Outline
- Gather reference images. Look for pictures that show the trunk’s width, bark texture, and any natural irregularities. Even a quick photo taken in a local park can serve as a useful guide.
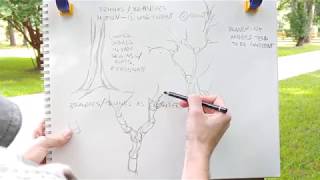
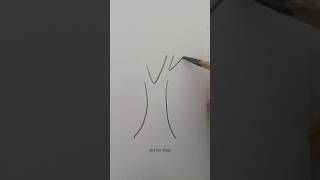
- Sketch the basic cylinder. Lightly draw two vertical lines that represent the sides of the trunk. Connect them at the top and bottom with gentle curves to suggest a slightly tapered shape.
- Define the base. Tree trunks often flare out near the ground. Add a subtle outward curve at the bottom to give the trunk stability.
- Mark major knots and bulges. Use short, irregular ovals to indicate knots. These will become focal points later when you add texture.
- Refine the contour. Erase any unnecessary construction lines and smooth the outer edge. Keep the line fluid; a stiff, mechanical outline looks less natural.
- Apply texture. With a fine‑line pen, draw short, curved strokes that follow the direction of the bark. Vary the length and pressure to suggest roughness.
- Finalize the outline. Darken the main trunk line, ensuring it is clean and continuous. This is the line you will later use for tracing or coloring.
Approach Tips: How to Stay Confident While You Draw
The focus is on the way to approach each stage, not on achieving perfection on the first try. If you’ve tried and failed before, consider these confidence‑building habits:
- Start loose. Begin with light strokes; you can always darken later.
- Use reference deliberately. Compare your sketch to the photo every few minutes to stay on track.
- Break the drawing into small goals. Finish the basic shape first, then move to texture, then to leaves.
- Practice the same trunk multiple times. Repetition builds muscle memory and reduces self‑doubt.
For a more structured confidence boost, the Intuitive Drawing Course offers guided lessons that help you overcome fear of the blank page and draw with assurance.
Adding Leaves Quickly – The Easy Way to Make a Tree 🌳
Once the trunk outline is complete, you can easily add foliage using a few simple techniques:
- Draw a series of overlapping ovals or cloud‑shaped forms at the top of the trunk. These become the basic canopy.
- Inside each oval, sketch short, pointed strokes that radiate outward – these are individual leaves.
- Vary the size and direction of the strokes to give the tree a natural, lively appearance.
- If you prefer a digital workflow, trace the outline in a vector program and use the “leaf” brush preset to fill the canopy quickly.
Many creators share short videos titled “Easy way to make a tree 🌳| sketch multiple leaves #shorts #crafts #trending #views #tree #leaf,” which demonstrate exactly this rapid‑leaf technique.
Using the Outline for Crafts and Design
When the trunk outline is clean, it becomes a versatile element for a range of projects:
- Cut‑out silhouettes. Print the outline, cut it with a craft knife, and use it as a stencil for painting or spray‑ink.
- Sticker or decal design. Convert the outline to a vector file and add color layers for a custom sticker set.
- Mixed‑media collage. Glue the outline onto a background, then layer torn paper leaves for a tactile effect.
One popular product that pairs well with a hand‑drawn trunk is the “Stunning New Combo: C7 Tree Trunk Outline & Blinkies!” – a set of LED blinkies that can be attached to the trunk for a whimsical night‑time display.
Step‑by‑Step Mini‑Course: From Scratch to Finished Tree
If you’re looking for a structured learning path, consider this short tutorial series:
- Lesson 1 – Sketch the trunk. Follow the outline steps above.
- Lesson 2 – Add bark texture. Practice short, curved lines and experiment with cross‑hatching.
- Lesson 3 – Create the canopy. Use the easy leaf method to fill the top.
- Lesson 4 – Color and shade. Apply a light wash of brown for the bark, then add darker shadows where the trunk curves.
- Lesson 5 – Final touches. Outline the whole tree with a fine pen, add a few birds or a squirrel for storytelling.
Each lesson can be completed in 10‑15 minutes, making it perfect for busy beginners or kids who enjoy quick wins.
Where to Find More Guidance
For ongoing support and fresh ideas, subscribe to DoodleDrawArt. The channel offers simple, quick how‑to draw lessons for kids and beginners, and frequently posts new tree‑drawing tutorials that build on the trunk‑outline foundation.
Conclusion
Drawing a tree trunk outline is a straightforward yet powerful skill. By focusing on a clear approach—starting with a light sketch, refining the shape, adding texture, and then expanding with leaves—you can create a tree that looks both natural and stylized. Use the confidence‑building tips, explore the quick‑leaf technique, and experiment with craft applications like the C7 Tree Trunk Outline & Blinkies combo. With regular practice and the resources mentioned above, you’ll be able to draw trees confidently, whether on paper, a tablet, or as part of a larger artistic project.