Understanding the Power of a Worksheet on Plot
When teachers design lesson plans, they often search for tools that can turn abstract literary concepts into concrete learning experiences. A worksheet on plot is one such tool that bridges the gap between theory and practice. It provides a structured framework for students to dissect a story’s sequence of events, identify key turning points, and appreciate how narrative structure shapes meaning.
The Role of Plot in Storytelling
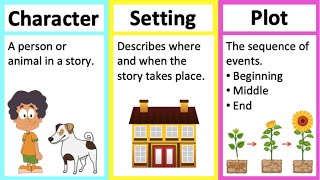
Plot is the skeleton of a narrative—its rise and fall, its peaks and valleys. Without a clear plot, a story can feel aimless. A well‑crafted plot guides the reader through conflict, climax, and resolution, ensuring that each part contributes to the whole. When students can identify these elements, they gain a deeper understanding of how authors build tension and deliver impact.
How a Worksheet Can Enhance Plot Analysis
Here is the reason why a dedicated worksheet is invaluable: it forces students to engage actively with the text. Instead of passively reading, they map out events, annotate cause and effect, and reflect on character motivations. This active engagement leads to better retention and critical thinking.
Below is a step‑by‑step guide to creating an effective worksheet on plot that you can adapt for any text, from classic novels to contemporary short stories.
Step 1: Identify the Core Components
- Exposition – Introduce the setting, main characters, and initial situation.
- Inciting Incident – Highlight the event that launches the conflict.
- Rising Action – List the series of complications that build tension.
- Climax – Pinpoint the turning point where stakes are highest.
- Falling Action – Note events that follow the climax and move toward resolution.
- Resolution – Summarize how conflicts are resolved and what the outcome is.
These sections form the backbone of the worksheet. Students can check off each component as they locate it in the text.
Step 2: Add Contextual Questions
To deepen analysis, include open‑ended questions that prompt students to think beyond the surface. For example:
- How does the inciting incident relate to the protagonist’s goal?
- What role does the setting play in the rising action?
- Which character’s actions most influence the climax?
- Is the resolution satisfactory? Why or why not?
These questions encourage students to connect plot elements with themes and character development.
Step 3: Incorporate Visual Aids
Visual representation can clarify complex plots. Consider adding a simple flowchart template where students can draw arrows linking events. A visual map helps them see cause‑effect relationships and anticipate upcoming twists.
Step 4: Use Real Texts and Page References
When working with a specific